

This post may contain affiliate links. Please read our full disclosure policy here.
Included in this guide you’ll find:
All images in this guide were taken on a Lenovo Tab 4 8 Plus running Android.
So why HERE WeGo and not Google Maps? Primarily because HERE WeGo is designed to work offline; whilst Google Maps does have an offline feature, the maps are trickier to handle because you can only download a square of the map rather than grab a whole country or region which uses much more local storage. The other reason is that HERE WeGo has a useful ‘Collections’ function that makes using it a doddle once you’ve put your itinerary into it (Though list functionality is now available in Google Maps too).
Below we’ll show you how we set the app up and programmed it for a simple day on our recent trip to Nova Scotia in Canada so that you can see how easy it is for yourself. Then we’ll also show you a more complex itinerary so that you can see how useful it is to use once you are on your trip.
*Please note: For the rest of this post the words in bold refer to the actions you will click on in the app to perform each step.
Want to save this for later? Click the Pinterest button on the left for a pinnable image!
Once installed, open the app and, for one time only, we need to do some account setup.
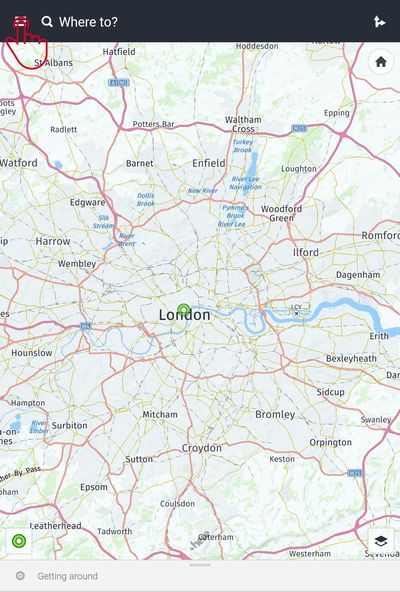
Click the Hamburger Icon in the top left, choose Sign In and then Next
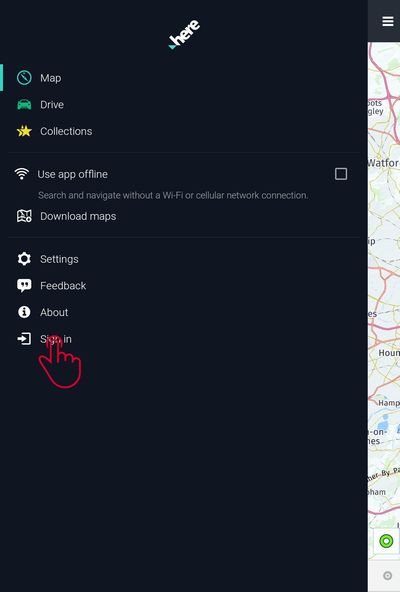

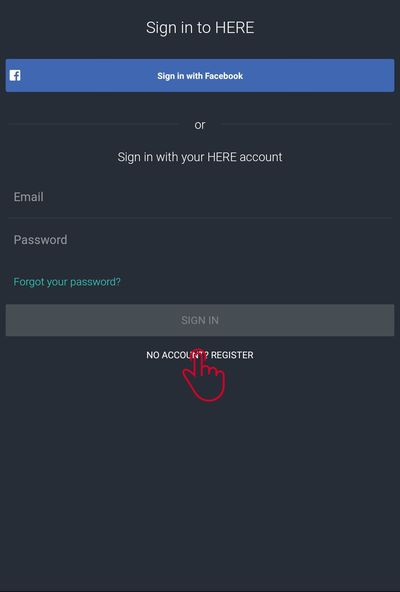
You can now sign-in if you already have an account, or register by clicking No account? Register. You can register through Facebook or the “old-fashioned way”. For Facebook, it will just connect to the app on your phone and create the account; or select the old-fashioned way, and then enter your details and click Next.

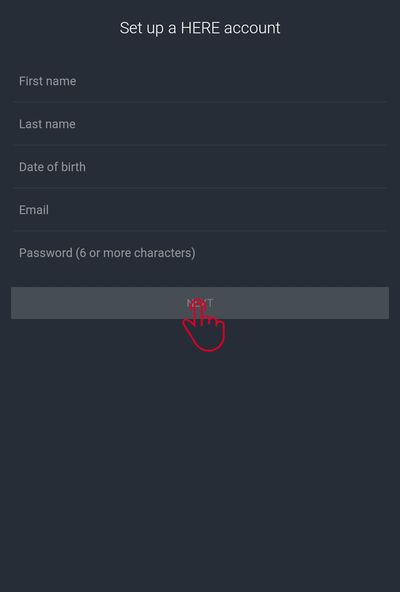
You will now get the Welcome screen and can click Come In to start using the app.


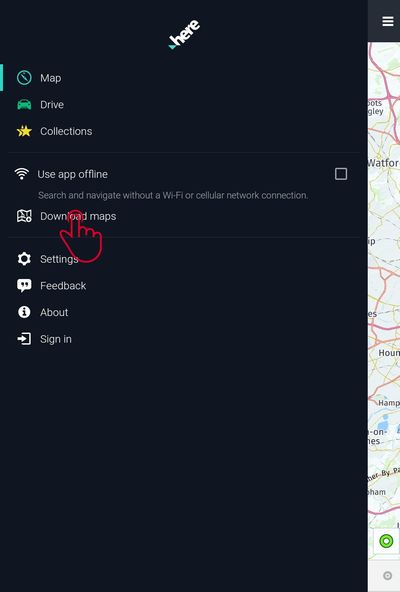
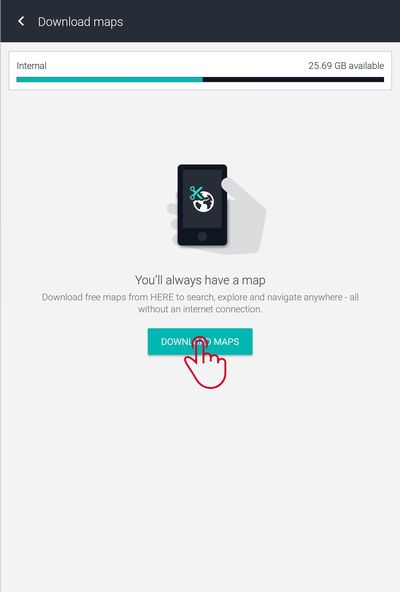
This takes you to the hierarchical list of all the maps available, arranged geographically. For large countries you can helpfully download parts of the map, such as a state or province, for others, it is the whole country. Be careful about downloading multiple segments though because sometimes two parts of a country can be a larger download than the whole thing. This is something we found with England and any other part of the UK as it’s less storage to download the UK as a whole.
Select your map by drilling down to it through the list:
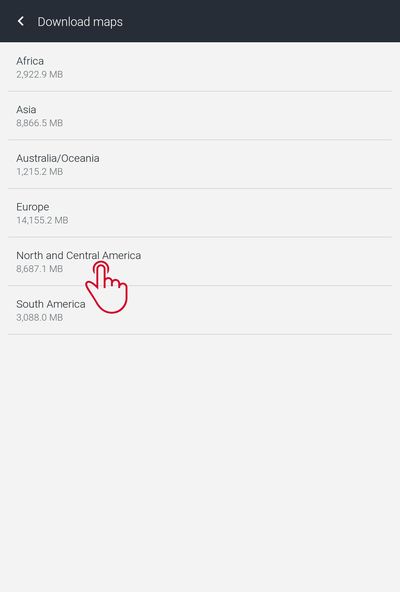
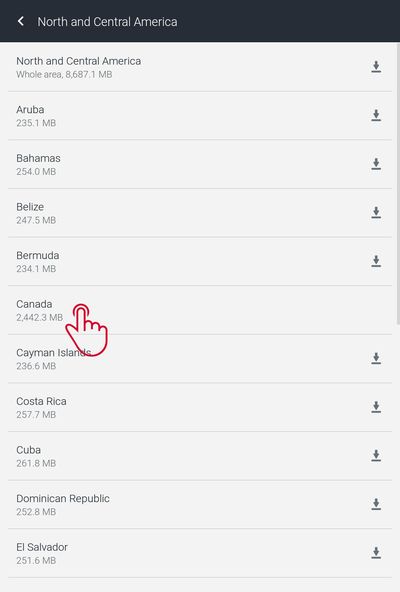
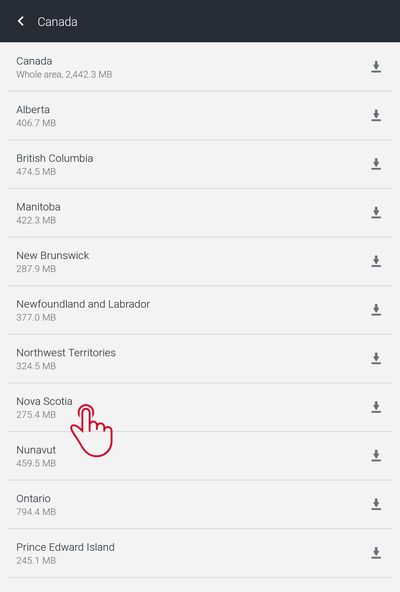
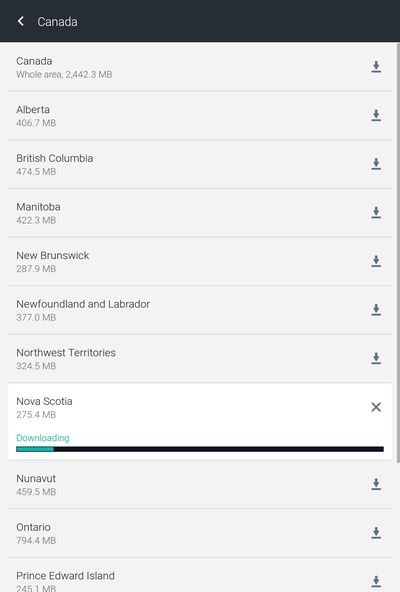
HERE WeGo will then download your chosen map to your local storage so it can be used offline. You’ll see the download screen while it gets the map and then once complete the Dustbin Icon appears so you can delete the map at a later date.
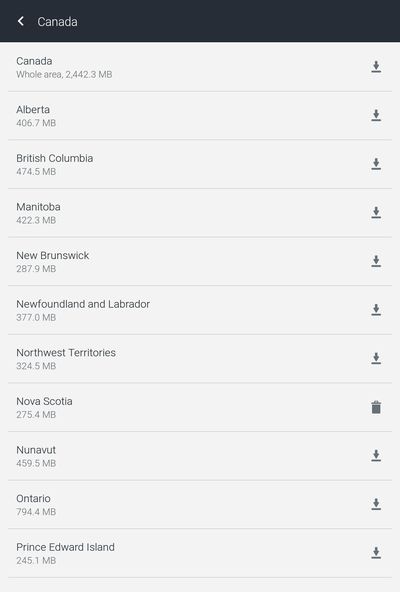
You can download additional maps if you need them, or start creating your itinerary in ‘Collections’.
You can now use the app offline when you are on the go on your trip, but we prefer to put all our destinations into it in advance so that we can just click each one and be on our way, rather than having to enter addresses etc. whilst on holiday.
From the main screen again, click the Hamburger Icon and select Collections.

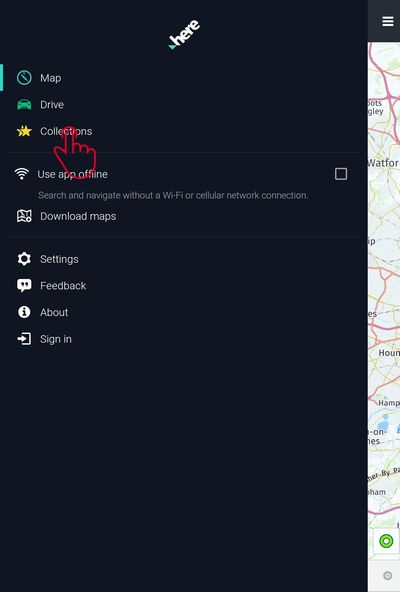
Your screen will start with a couple of HERE WeGo supplied collections, but we like to have a collection for each day of our trip. If we want to add Day 8, we click the Add Collection star, enter the name of our new collection and click OK to see it appear in our list.
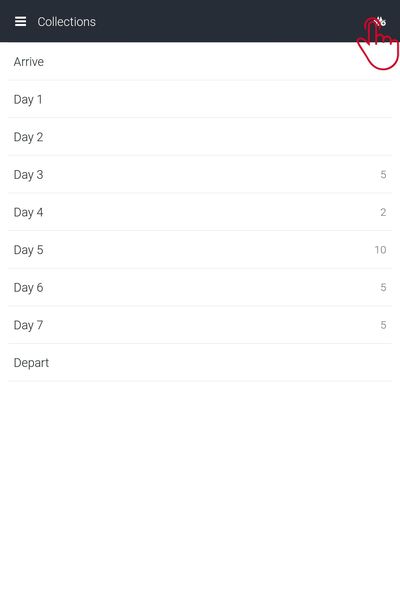
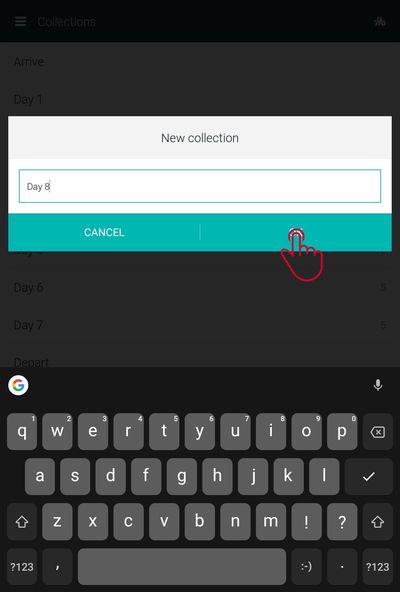
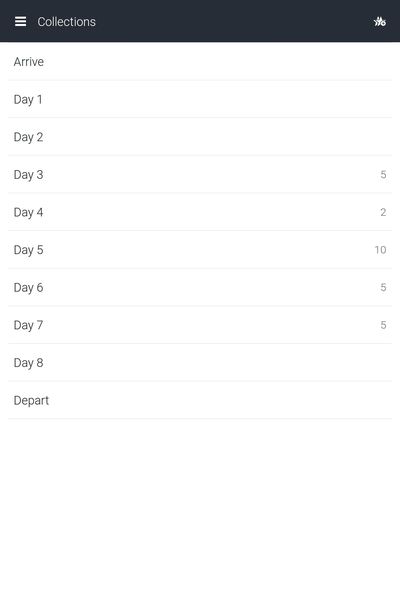
Now it’s time to enter our itinerary into the collection. As you can see most of our trip to Canada is already planned, we just need to finish Day 2 which is a light day of sightseeing for us. With just one place to see how will we cope? :-)
From the main screen, search for the place you will be visiting in the Where To? box and choose from the drop-down list of matching places which will take you to the map view for the selected place.
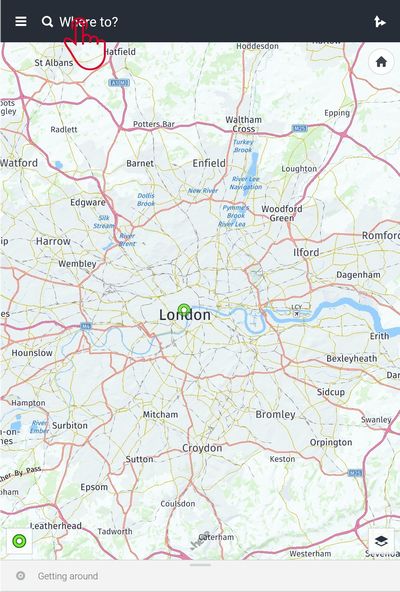
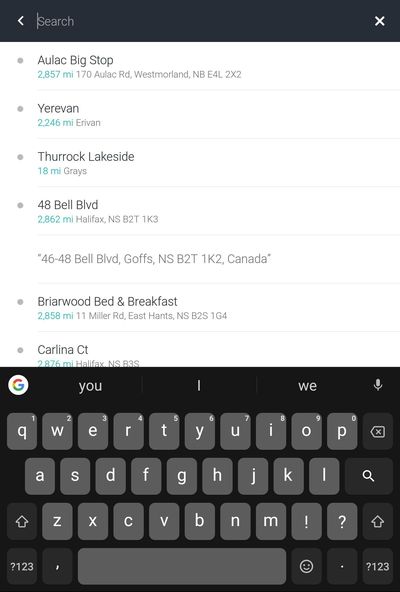
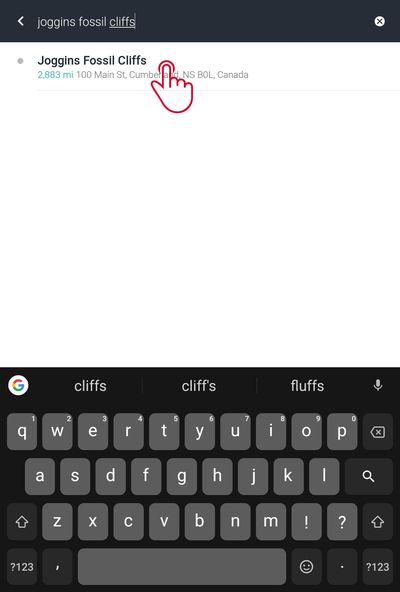
To add to the collection click the star in the top right and select which collection to add the place to (you can add it to multiple collections for things like hotels).
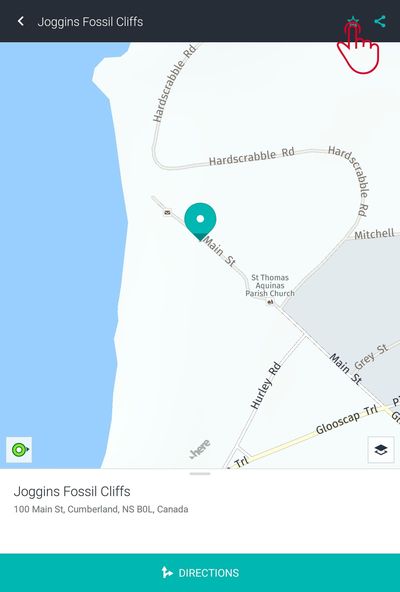
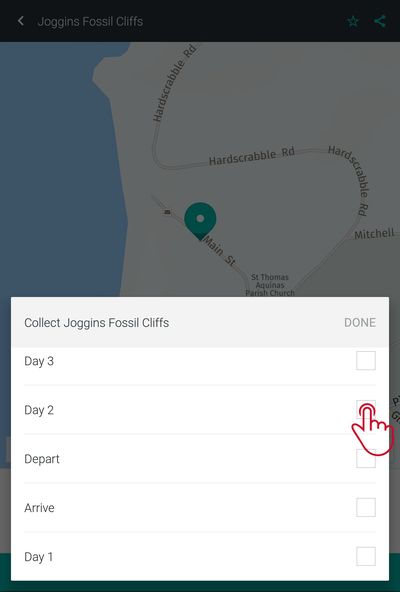
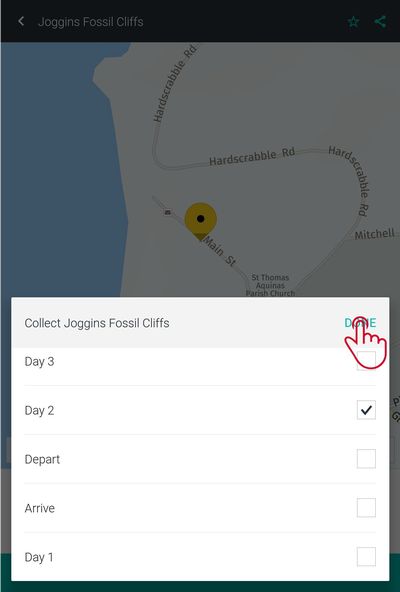
Please Note: There is no way to sort a collection so, as we like our collection to be in the order we will visit things on a particular day, we make sure we add them in order we want to see them. This means that for places like hotels (that you might have in multiple collections) it is important to add them once all other activities for each of the days have been added so they will appear at the end of the list for that day.
We can now do these same steps for every place on our trip until we have all of our collections complete and ready to use. Once you are done, we advise that you set HERE WeGo to offline mode to avoid any unwanted data charges abroad. Also, the app seems happier being set to offline mode when it is connected to the internet than when it doesn’t have a data connection at all, so that’s a habit we have now got into.
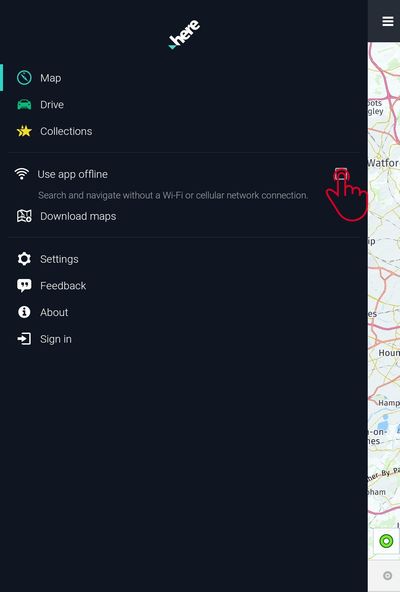
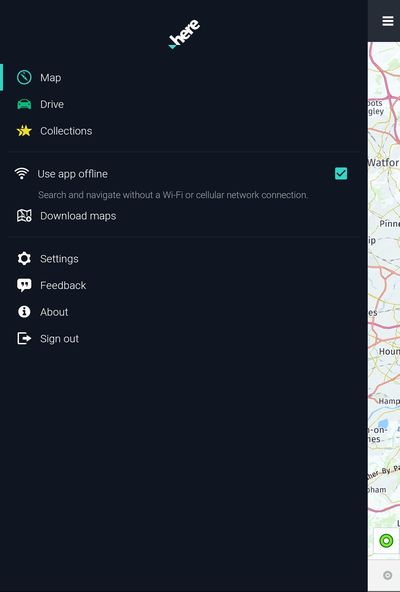
From the main menu click the Hamburger Icon and select Use App Offline. And that’s it, you are ready to go!

You’ve arrived at your destination, suffered the queue at immigration, been pleasantly surprised the airline didn’t lose your luggage, worked out how to get to the car rental place and picked up your car. Your body is telling you it’s 2 AM, you’re about to drive on the “wrong” side of the road in an unfamiliar country so frankly, the last thing you need to do is to struggle with directions. It’s time to make your first use of all the preparation work you’ve put in :-)
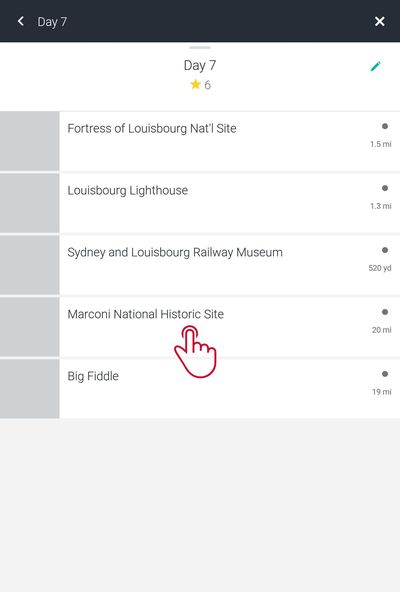
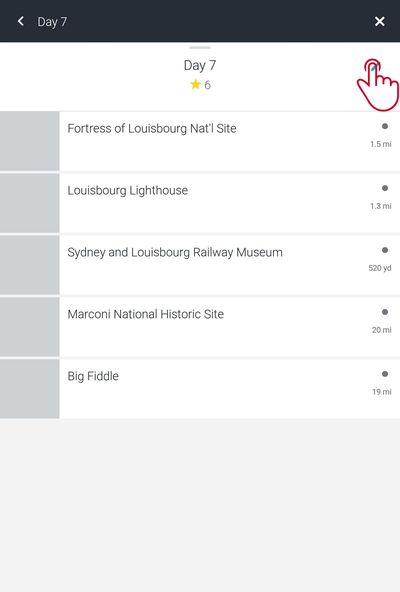
Now you’ve prepared, using the app is nice and easy. From the main screen click the Hamburger Icon, select Collections and then select the collection for the day of the trip you are on to get to the list of places. The example below uses Day 7 of our Nova Scotia itinerary as it has a few more things to do to show you how this works.


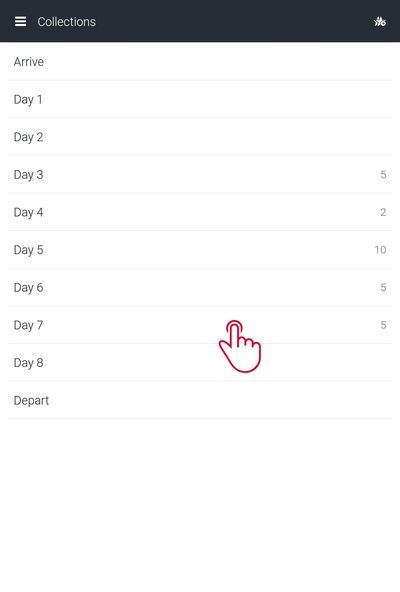
Now select the location you’d like to navigate to, check it’s right on the map screen, and click the Directions button at the bottom of the screen and the app will start searching for a route.
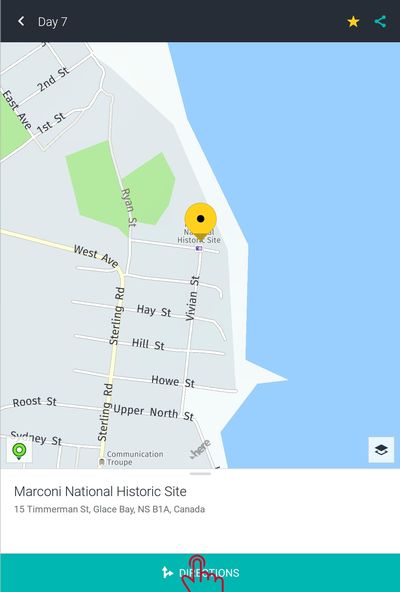

Once it’s found a route it will show you a couple of options and we pretty much always just choose the first option. We then verify the routing on the map screen and click the Start Button to start navigating. Then just follow the directions to your destination! The app will speak the directions aloud so you can connect this to your car’s speakers with Bluetooth, or we just turn the volume up as loud as possible on the tablet and that works too.
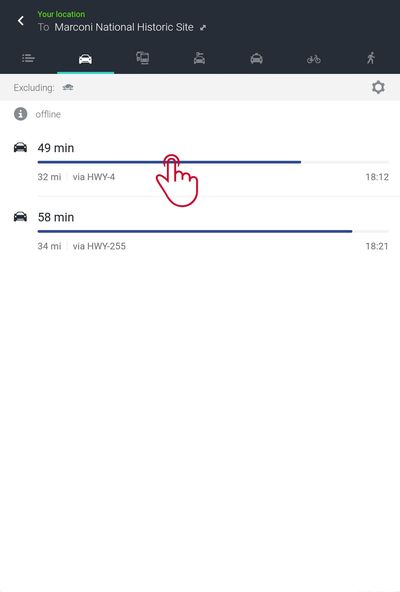
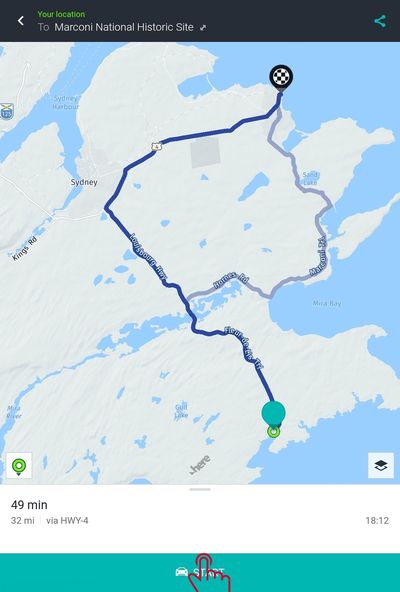
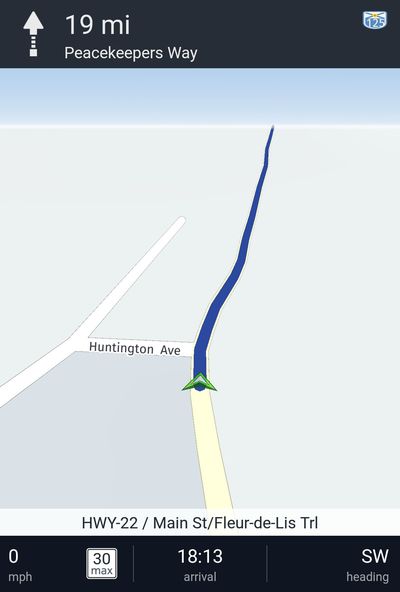
Please Note: Along the top of the options screen (leftmost image above) you can select the mode of transport. We have used HERE WeGo for transit directions (though for this it is best to have a data connection for real-time schedules) and for walking between our sites if we are exploring a city on foot. It’s worked really well for us and is now an essential component of our travelling.


Now click the Edit Icon in the top right and the distance markers will change to Delete Icons. Click each one to remove that place from the collection.
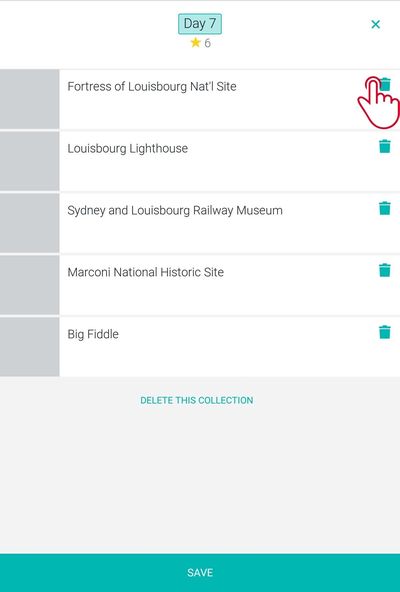
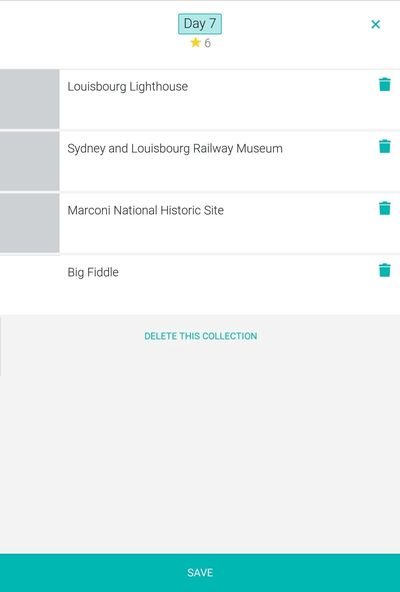
Once you’ve deleted them all, click Save and repeat for each day of your trip. The empty collections are then ready for you to start preparing for your next trip.
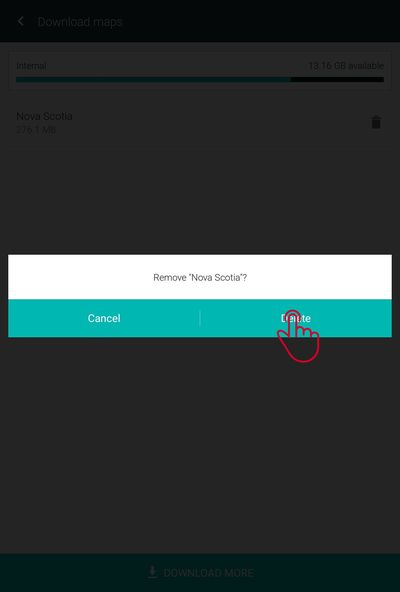
The last thing to do is to remove the offline map to free up storage for the next map you will need. Click the Hamburger Icon, select Delete Map and a list of installed maps is shown. Click the Dustbin Icon to remove the map from your device.


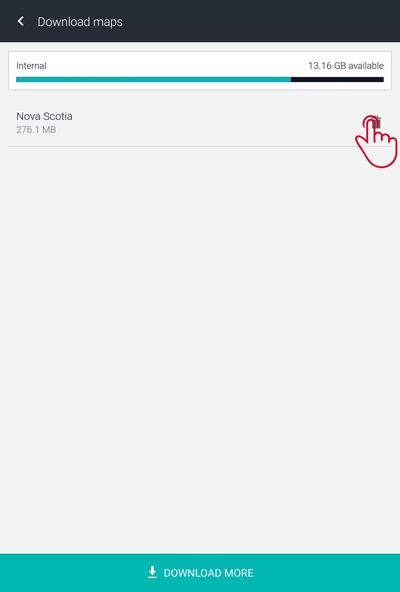
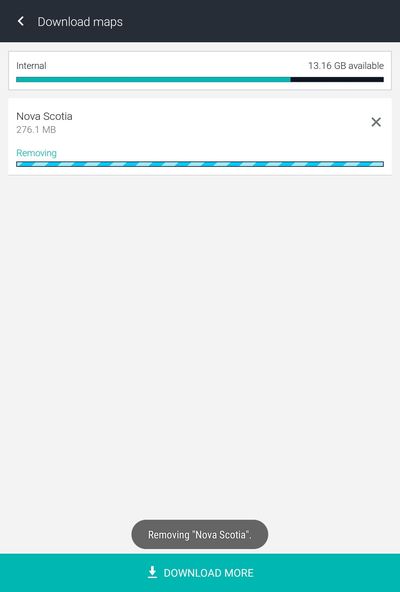
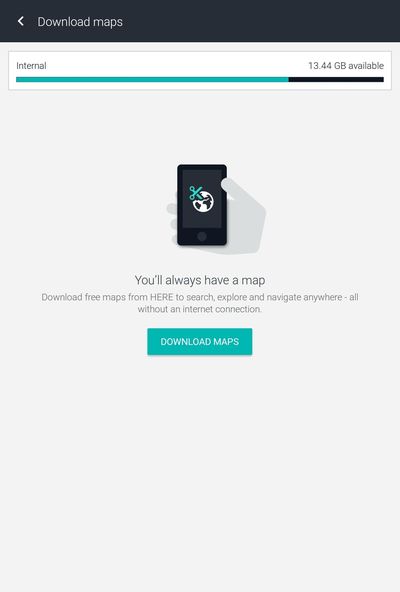
Click Delete to confirm you want to remove the map (a short animation will show whilst the map is being removed) and once complete the list of maps will be shown minus the map you deleted.
Have you used HERE WeGo in your travels?
If so, do you have any other tips for us to increase its functionality?
Want to save this for later? Click the Pinterest button on the left for a pinnable image!
RESOURCES | PLAN YOUR NEXT TRIP
To book flights, rental cars, accommodations, and activities for your trip, please check out our recommended travel providers, favourite apps and websites.
Some of the links in the post above are affiliate links. This means if you click on the link and purchase the item, we will receive an affiliate commission but this does not affect the price to you. Please read our full disclosure policy here.
